It is essential to know how to take a screenshot on the Samsung Galaxy Tab S7 Plus phone for any number of reasons, which is why it can be helpful to learn the steps for this process.
If you have just been gifted a new Samsung Galaxy Tab S7 Plus, you might be wondering how to take a screenshot. Samsung phones have typically had the same or similar methods for taking screenshots.
We’ve shown you six easy methods for taking screenshots on your Samsung Galaxy Tab S7 Plus phone below and picking up one for your needs.
Must read: How to fix Samsung Galaxy Tab S7 Plus common problems
Page Contents
- 1 Why Take a Screenshot?
- 2 Steps To Take a Screenshot on the Samsung Galaxy Tab S7 Plus
- 2.1 Method 1: Take Screenshot using Hardware Keys
- 2.2 Method 2: Capture Screenshot using Assistant Menu
- 2.3 Method 3: Palm Swipe to Capture Screenshot
- 2.4 Method 4: Take a Screenshot using Google Assistant
- 2.5 Method 5: Capture Long Screenshot on Samsung Galaxy Tab S7 Plus
- 2.6 Method 6: Take Screenshot on Samsung Galaxy Tab S7 Plus via Third-Party App
- 3 How to View the Taken Screenshots?
- 4 Conclusion
Why Take a Screenshot?
Taking a screenshot is one of the most popular and easiest ways to share what you’re doing with friends and family. Whether you’re taking a picture of your progress in a game or want to save an interesting article for later, screenshots are an essential tool for any phone owner.
There are many ways to take screenshots on an Android phone, including the Samsung Galaxy Tab S7 Plus smartphone. Follow the below steps to learn all the methods to capture screenshots.
Also read, How to Root Samsung Galaxy Tab S7 Plus
Steps To Take a Screenshot on the Samsung Galaxy Tab S7 Plus
Samsung Galaxy Tab S7 Plus phone has different methods of taking a screenshot, so it won’t be hard to find an option that’s right for you.
One popular method is pressing two hardware keys on your phone simultaneously, but it might be faster for you to use an Air Command gesture. We have shown you six ways to take a screenshot on the Samsung Galaxy Tab S7 Plus device.
Related Guide: How to Hard Reset & Factory Reset Samsung Galaxy Tab S7 Plus
Method 1: Take Screenshot using Hardware Keys
Android smartphones have a built-in feature for taking screenshots. This feature is accessed by pressing the volume down and power buttons simultaneously. The screenshot will be saved to your gallery automatically.
Steps:
- Press Volume Down and Power buttons together.
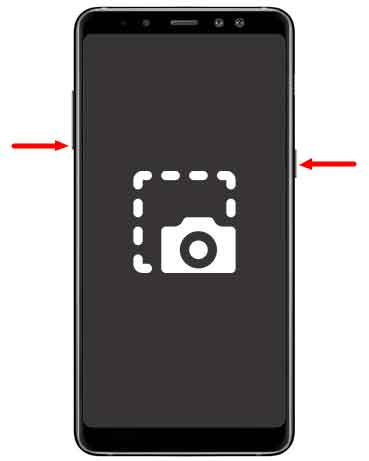
- The device will take a screenshot and save it in your gallery.
You can follow this article to learn How to Unlock the Bootloader on Samsung Galaxy Tab S7 Plus
Method 2: Capture Screenshot using Assistant Menu
If you’ve broken the hardware keys on your Samsung Galaxy Tab S7 Plus, then Assistant Menu will be handy. This is the second alternative for people with broken devices. To enable Assistant Menu, follow the below steps:
- Go to the Settings menu.
- After that, scroll down and tap on Accessibility.
- Now, tap on the Interaction and dexterity option.
- Toggle the ON Assistant menu option.
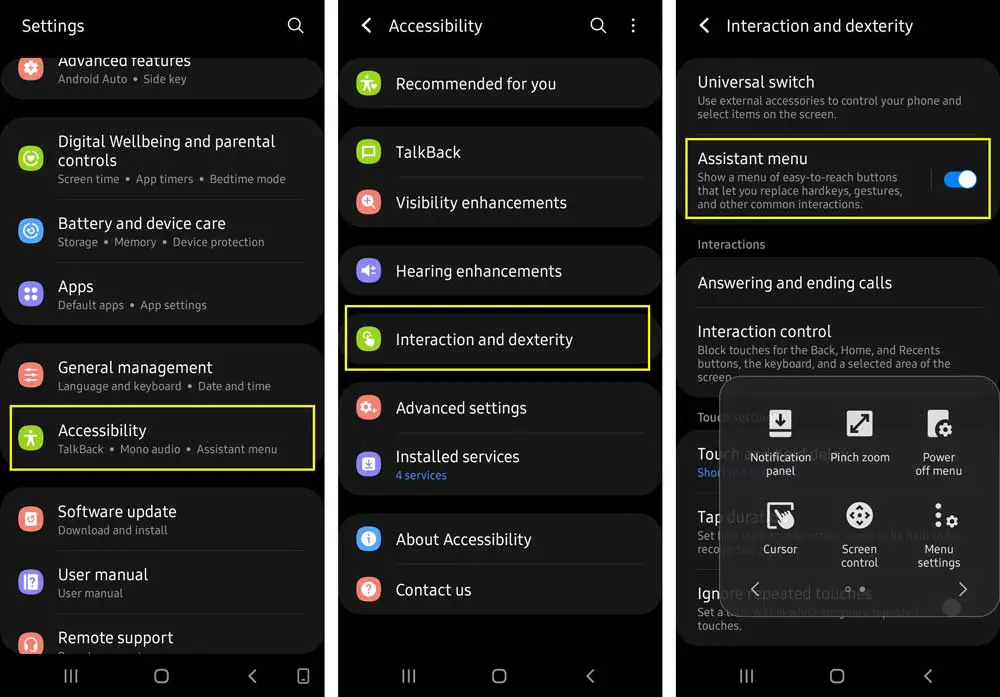
- Tap on the circle (assistant option) and select the screenshot option to take screenshots.
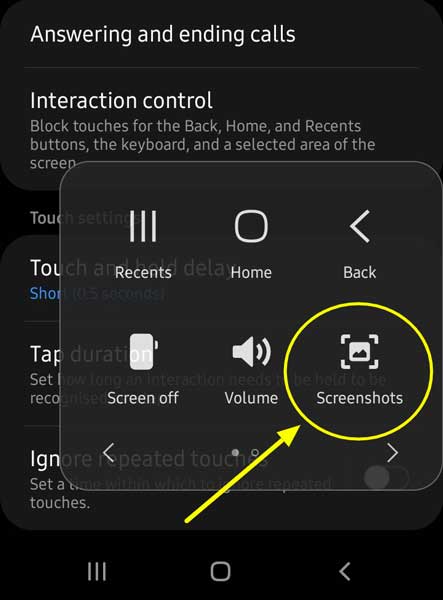
- The phone will flash white to confirm the screenshot is taken.
So in this way, you can easily take screenshots using the Assistant feature.
Related Guide, Enter Fastboot & Recovery Mode on Samsung Galaxy Tab S7 Plus
Method 3: Palm Swipe to Capture Screenshot
Palm Swipe to Capture Screenshot is a unique feature that allows users to capture screenshots of their phone screen by simply swiping the screen with the palm of their hand. See the below steps to know how?
- To enable Palm Swipe, Go to the Settings page → Advanced Features → Motions and Gestures.
- Now toggle ON the Palm swipe to capture option. This option is disabled by default.
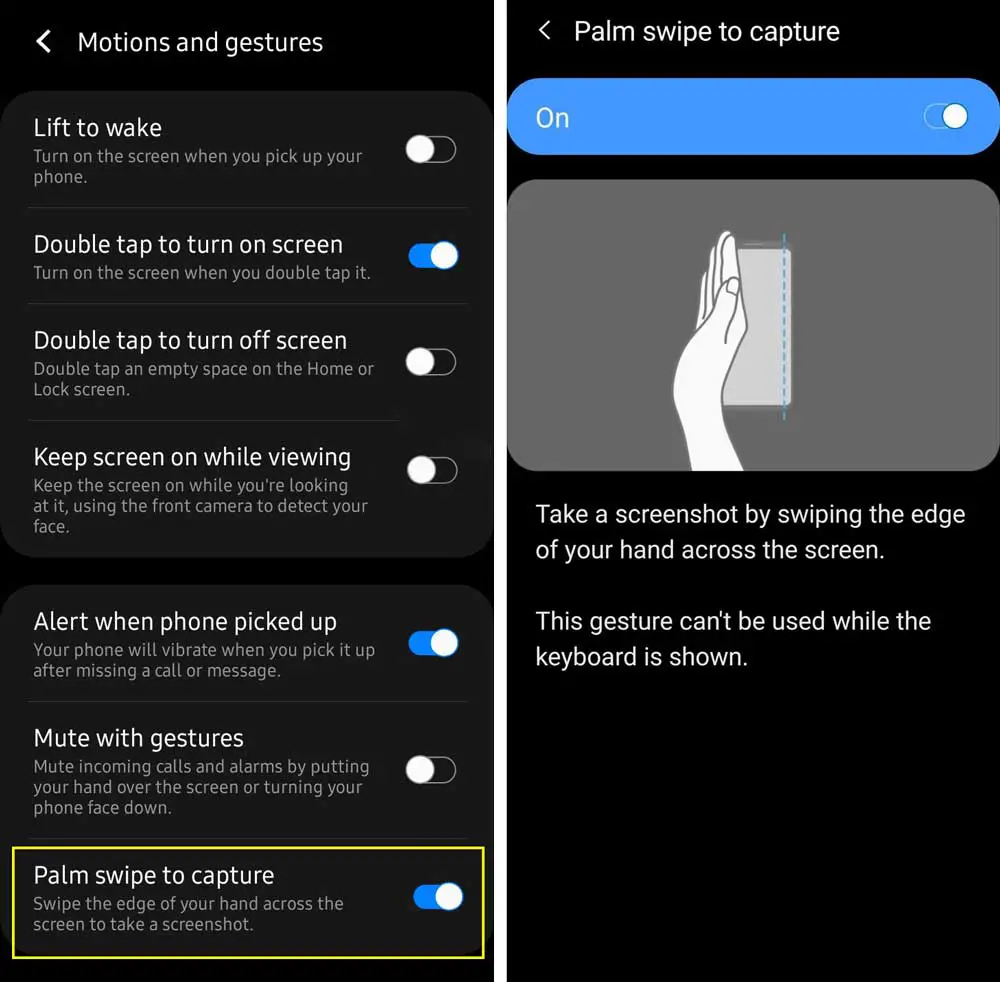
- To take a screenshot, just swipe your hand across the screen. The phone will vibrate to let you know that it has been done.
Also read: Download Google Camera for Samsung Galaxy Tab S7 Plus
Method 4: Take a Screenshot using Google Assistant
It is possible to take a screenshot using Google Assistant. Here are the steps to take a screenshot with Google Assistant:
- Open any app on your Samsung Galaxy Tab S7 Plus phone that has an interface you want to capture.
- All you have to do is say “OK Google, take a screenshot” or “take screenshot” into the microphone of your phone.
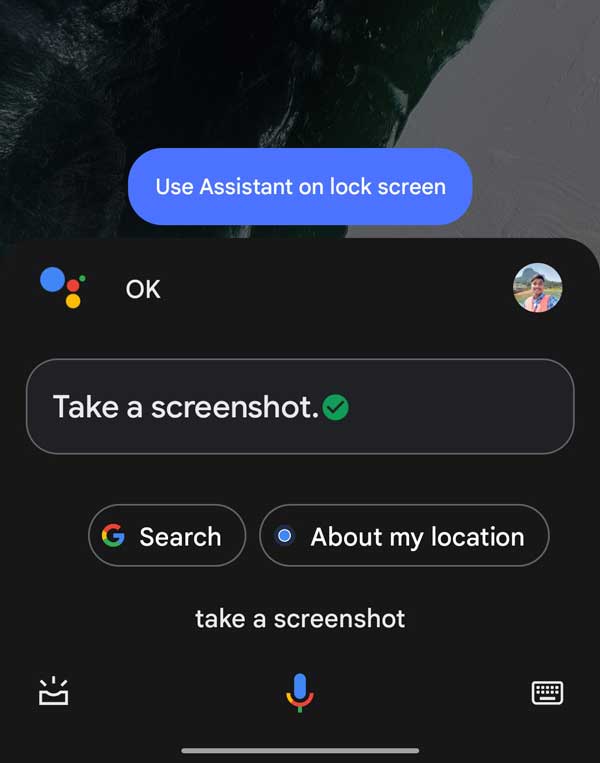
- The screen will flash white shortly, and then see your latest screenshot, open the Photos app and go to Screenshots.
Method 5: Capture Long Screenshot on Samsung Galaxy Tab S7 Plus
Taking a long screenshot on your Samsung Galaxy Tab S7 Plus device is not as difficult as you might think. The process is only slightly different from taking a regular screenshot.
- First, go to the Settings page.
- Scroll down and tap on Advanced Features.
- Under Advanced features tap on the Screenshots.
- Now enable the Screenshot toolbar option.
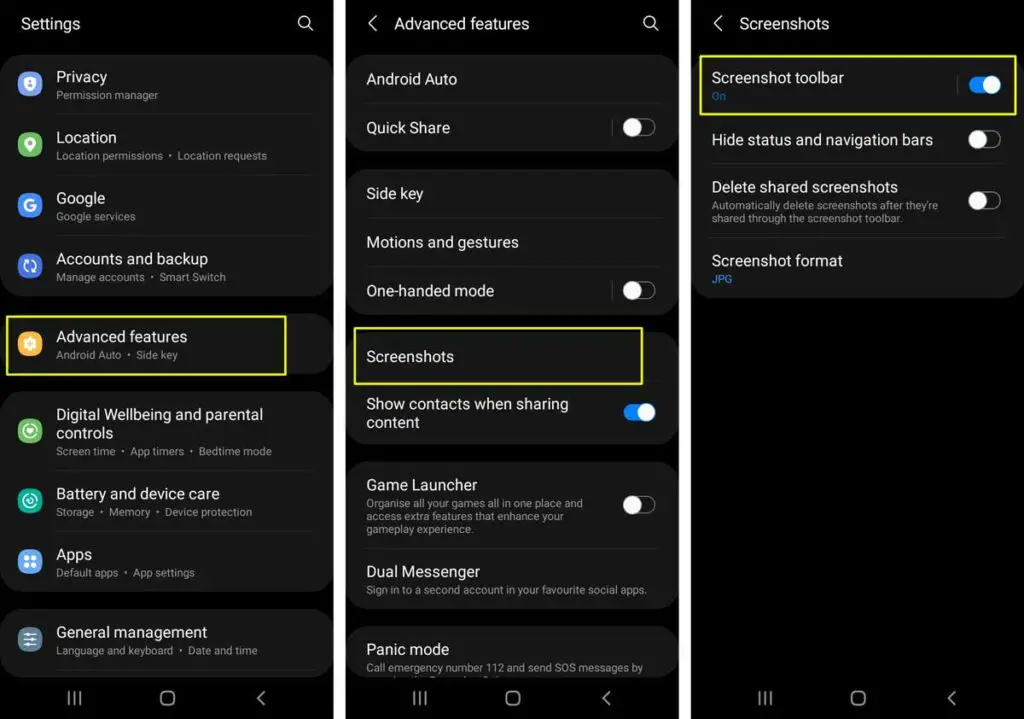
- After this, you will see a toolbar menu at the bottom.
- Click on the enlarging icon, and the screen will enlarge.
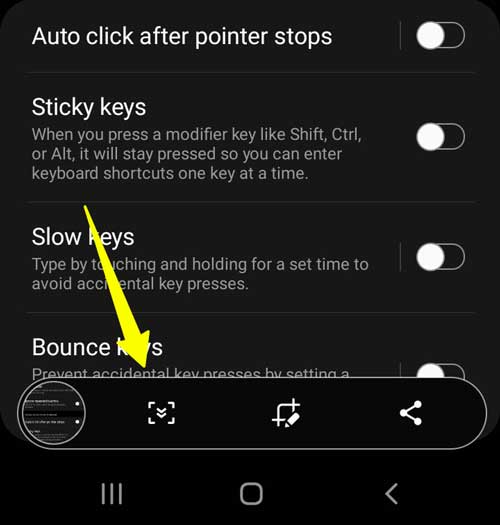
- That’s it. You have successfully Taken Long Screenshot on the Samsung Galaxy Tab S7 Plus device.
Method 6: Take Screenshot on Samsung Galaxy Tab S7 Plus via Third-Party App
- Head over to Google Playstore.
- Search for Screenshot Easy app and install it.
- Open the app and tap on Start Capture.
- Now head over to any screen that you want to take a screenshot of, open the notification panel, and see Screenshot Easy notification tap on it.
- The device will take a screenshot and save it in your gallery.
How to View the Taken Screenshots?
There are many ways to view screenshots on Samsung Galaxy Tab S7 Plus. You can use a gallery app or a file manager to view them.
Gallery app: The default gallery app that comes with the Samsung Galaxy Tab S7 Plus phone provides a way to view all the screenshots taken on your device. You can find it in the app drawer and open it by tapping on it.
File Manager: If you have installed a different file manager, you can also use that. You will need to open the file manager and go to its “Pictures” section, where all your screenshots will be available for viewing.
Conclusion
This step-by-step guide was about capturing screenshots on the Samsung Galaxy Tab S7 Plus. We hope you learned a lot from this article and found it helpful! What was your favorite method for screenshot capture? Let us know in the comments.
In addition, if you know of any other methods for taking screenshots that we might have missed, please leave a comment below, and we will update this post with your suggestion.
