
If you’re looking for a way to Root Xiaomi 13 Pro using Magisk and without installing TWRP, then this guide is exactly what you need. I will show you the complete steps to Root this device with Magisk. The steps are easy enough that even a beginner can follow along.
Rooting your device will give you access to all sorts of excellent features, such as being able to install custom ROMs, systemless Xposed framework, and other mods that would have otherwise been unavailable on an unrooted Android device.
The process outlined in this blog post requires no knowledge of flashing or rooting devices whatsoever; it’s easy enough for anyone who knows how to use a computer and has some time on their hands, even if they’ve never rooted a phone before.
Page Contents
What is Rooting Android?
Rooting Android is a process in that users do not limit the use of their device. It enables modifying your device’s operating system and gives access to core files.
The main intention of this process is to remove all default restrictions set by the manufacturer so you can modify and delete anything you want from the ROM of your device.
Once rooting Android has been completed, users are given admin privileges, which means they have complete control over every setting in the phone or tablet. This means removing bloatware (unnecessary software) will be more accessible than ever before.
Also read: How to fix Xiaomi 13 Pro common problems
Advantages of Rooting
- Easy to install Custom ROMs
- Flash Magisk Modules
- Removing pre-installed OEM apps
- Ad-blocking for all apps
- Installing incompatible apps
- More display options and internal storage
- More excellent battery life and speed
- Making full device backups
- Access to system files
- CPU Clocking
- More tweaking
Also read: Download Google Camera for Xiaomi 13 Pro
Disadvantages of Rooting
- It can brick your device
- No more warranty
- Root and superuser access
- Tweaking risks
- Ad-blocking
- Update problems
Related Guide: Hard Reset & Factory Reset Xiaomi 13 Pro
Pre-requirements
- The process will wipe all data from the device, so please back up any information you don’t want to be lost before proceeding with this installation. Refer to this guide to Backup Complete Android.
- Before moving to the steps, fully charge your Xiaomi 13 Pro device to avoid any errors in between the process.
- You need to download and install ADB drivers on your PC. If you don’t have drivers, your phone will not be recognized by your computer.
If you want a professional to Root your Phone, you must try One Click Root.
Why Choose One Click Root?
- Safe and Secure
- Warranty Protection
- No Root – No Charge
- 100% Rooting Guarantee
- Skillfully Rooted Remotely
- 24/7 Live Chat – Lifetime Access
Steps to Root Xiaomi 13 Pro using Magisk
Installing Magisk on your phone simplifies the process of rooting. There are two steps to installing it, unlocking the bootloader and flashing a modified boot image.
Unlocking allows you to flash unofficial images and modify system files.
Step 1: Unlock Bootloader on Xiaomi 13 Pro
Android phones often include secure locks a locked Bootloader, which prevent users from installing custom operating systems, flashing, rooting their devices.
Unlocking the bootloader on an Android phone is essential for those who want to flash Custom ROMs, Root, and much more. You can’t get as far without unlocking the bootloader, which prevents rooting and flashing custom images, making it necessary before you proceed with other steps.
You can follow this article to learn how to Unlock the bootloader on Xiaomi 13 Pro.
Step 2: Install Magisk App and Patch Boot Image
First, you need to Download the Stock firmware file for Xiaomi 13 Pro device. There are various sources from where you can download the Xiaomi firmware.
Once we get the firmware, we extract it and get the boot image file. We will patch this boot image file with the help of the Magisk application and then flash it on the phone to obtain root access.
- After you have downloaded the firmware file, extract it.
- Open the extracted folder and copy the boot.img file to your phone.
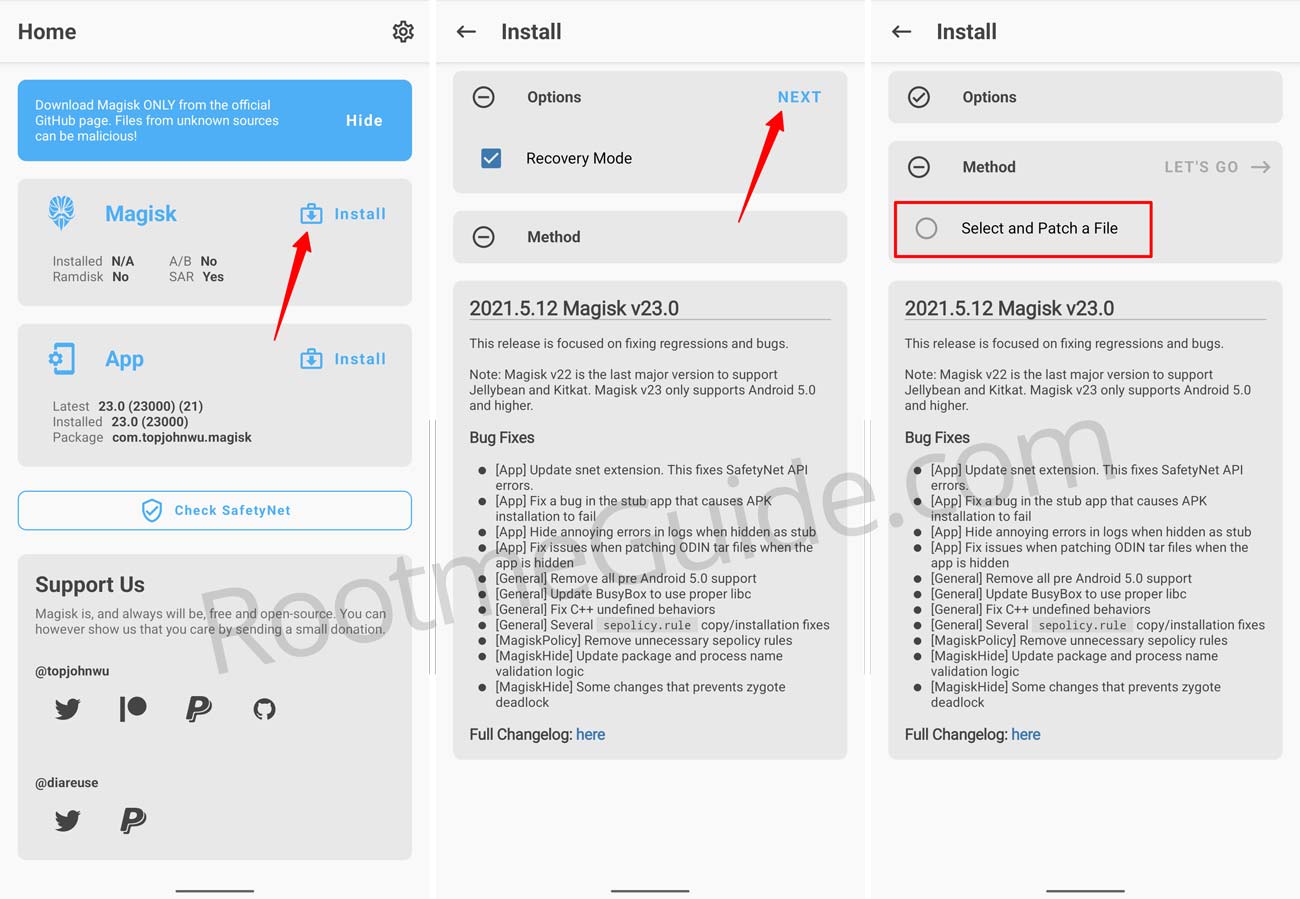
- Download the latest Magisk App and Install it.
- Open the Magisk App from the app drawer.
- Tap on Install → “Select and Patch a File.”
- Navigate to the location where you copied boot.img file and select it.

- Once you select the file, tap on “LET’S GO.”
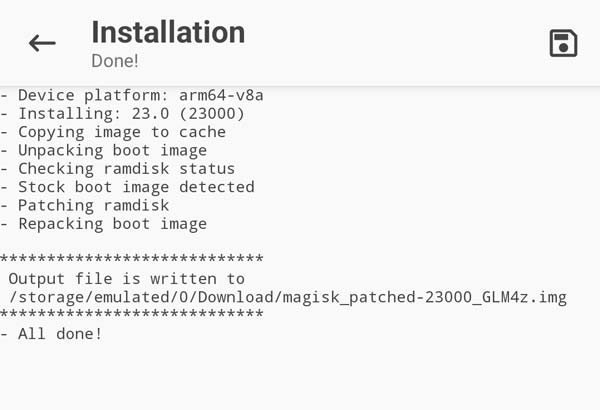
- Wait until Magisk patches the boot image file. The patched boot image (magisk_patched.img) file can be found in the “Downloads folder.”

- Rename magisk_patched.img to boot.img again.
- Copy the boot.img file to your PC/laptop.
Step 3: Flash Magisk patched boot image
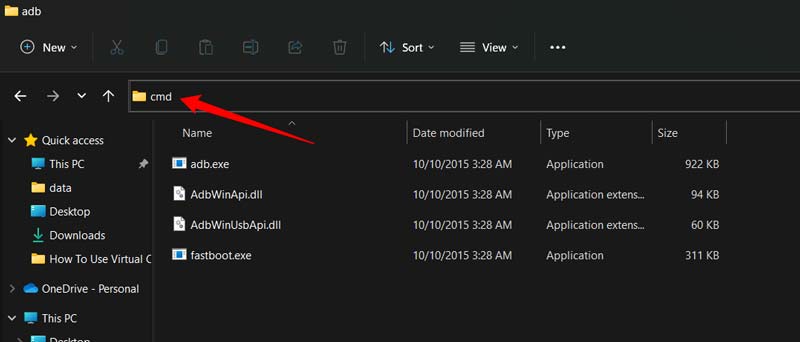
Once you have copied the boot image file to PC, now you need to move this file to this location – C:\adb.
- Once you are inside the ADB folder. Type “cmd” in the address bar.

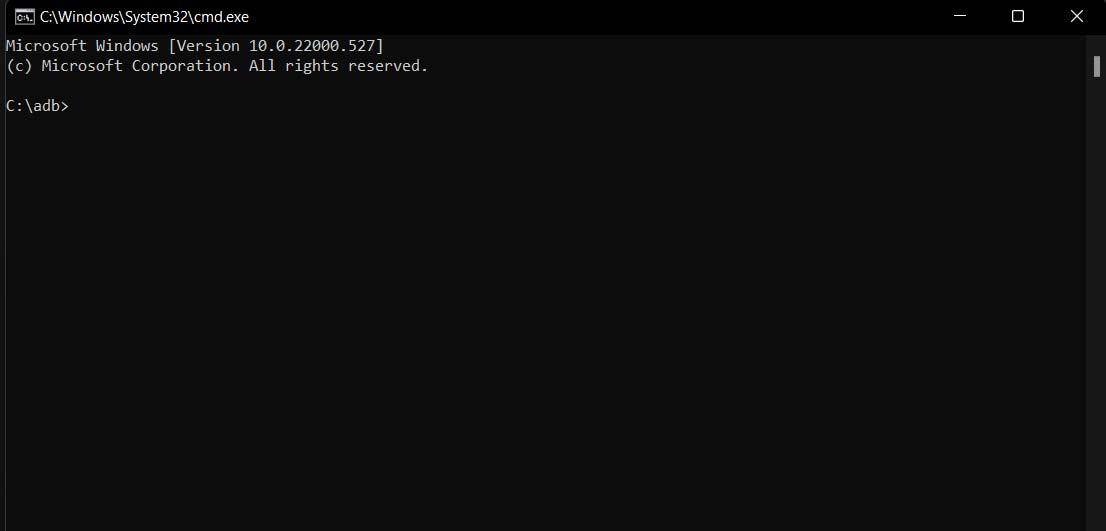
- Now command prompt window will appear on your screen.

- Connect your Xiaomi device to your computer.
- On the command line window, type the below command and hit Enter.
fastboot devices
- This will show the list of connected devices. Check if your device is showing on the command line windows. If it is showing, that means your phone is successfully connected to your computer.
adb reboot bootloader
- The above command will boot your phone into fastboot mode. Next, type the below command to flash the boot image file and again hit Enter.
- For A/B partition system:
fastboot flash boot boot.img
- For Non-A/B partition system:
fastboot flash boot_a patched_boot.img
fastboot flash boot_b patched_boot.img
- For A/B partition system:
- We have successfully flashed the boot image file. Now Reboot your phone by entering the below command.
fastboot reboot
- That’s it. Your Xiaomi 13 Pro smartphone is successfully Rooted using Magisk.
Step 4: Verify Root Access on Xiaomi 13 Pro
To check if your Xiaomi device is rooted successfully or not, you can follow the below steps.
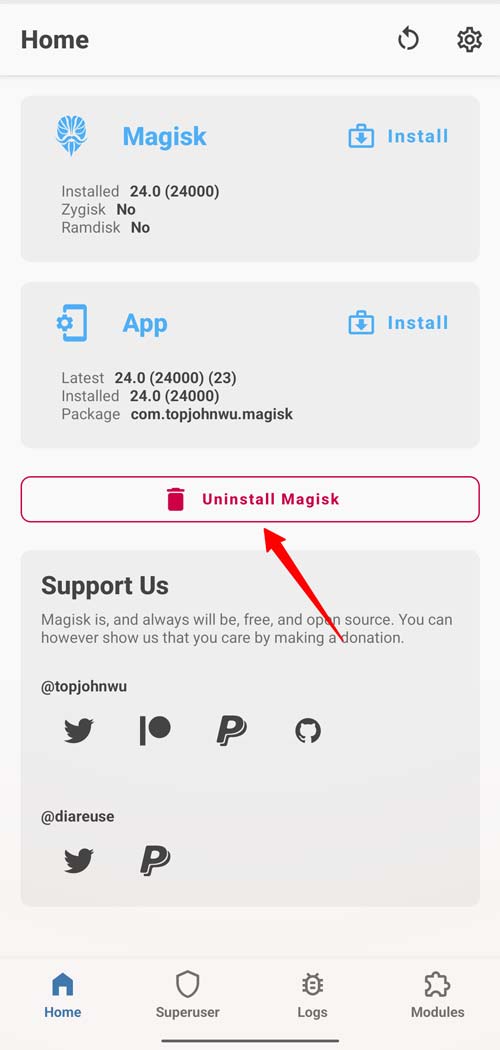
- Open Magisk App from the app drawer.

- You will see the option to “Uninstall Magisk,” which indicates that your phone is rooted successfully.
If you encounter issues after Rooting and you want to remove Magisk from the Xiaomi 13 Pro device completely. You follow this article on how to Uninstall Magisk and Remove root access.
Conclusion
We hope you have found our tutorial on Rooting Xiaomi 13 Pro with the help of Magisk to be informative. Your device will be rooted in a few simple steps and running smoothly again with these instructions.
If there are any additional questions, please feel free to reach out, and we will get back to you as soon as possible!